Finishing Kylie's CO 14ers
Route & Elevation
Access: Lake Como Road requires 4x4 vehicle. Park around 9,000 - 10,200'. 3-mile hike to Lake Como basecamp (11,800').
Key Waypoints: - Walk around Lake Como to treeline (12,000') - Road end at Blue Lakes (12,200') - Ascend headwall left of waterfall via switchbacks - Pass small lakes at 12,600' and 12,650', then Crater Lake (12,800') - Junction at 13,400' - mark on GPS where Ellingwood and Blanca routes diverge
Blanca Route: Traverse northwest face to northwest ridge. Stay right of ridge crest (left can become dangerous). Well-cairned with switchbacks. Multiple paths near summit -> more rockfall risk.
Traverse Options: Class 3 scramble OR "difficult" Class 2 traverse. Groups can be directly above each other - radio communication critical for spacing.
Ellingwood Point: More difficult Class 2 with larger rocks/talus. Multiple descent routes possible but higher rockfall potential.
Water: Not much/none until 10,500' on approach. Streams available at Lake Como.
Trip Overview
This was such an awesome trip! My wife Kylie just completed her final Colorado 14er on Ellingwood Point! We had a group of 5 experienced hikers and climbers plus one medium athletic dog. The 2-day, 1-night trip covered 12.41 miles total. This route does have some technical terrain and rockfall risks that are worth knowing about, and depending on your fitness level, recent sleep, and climbing experience, it could present different levels of difficulty.
Planning & Permits
The good news is you don't need any permits for this area. We coordinated via text over the 2-3 weeks leading up to the trip, then all met in Denver and drove down to the Lake Como road together. We spent time checking the weather forecast before heading out and knew that afternoon storms were possible (as they always are in Colorado summers). We also knew there would be clouds but no threat of severe weather the morning of our climb.
One thing that made a huge difference was coordinating radios beforehand. We had 4 Rocky Talkies in the group, which turned out to be absolutely essential for safety on the more technical parts of the traverse between peaks.
Access & Approach: Lake Como Road
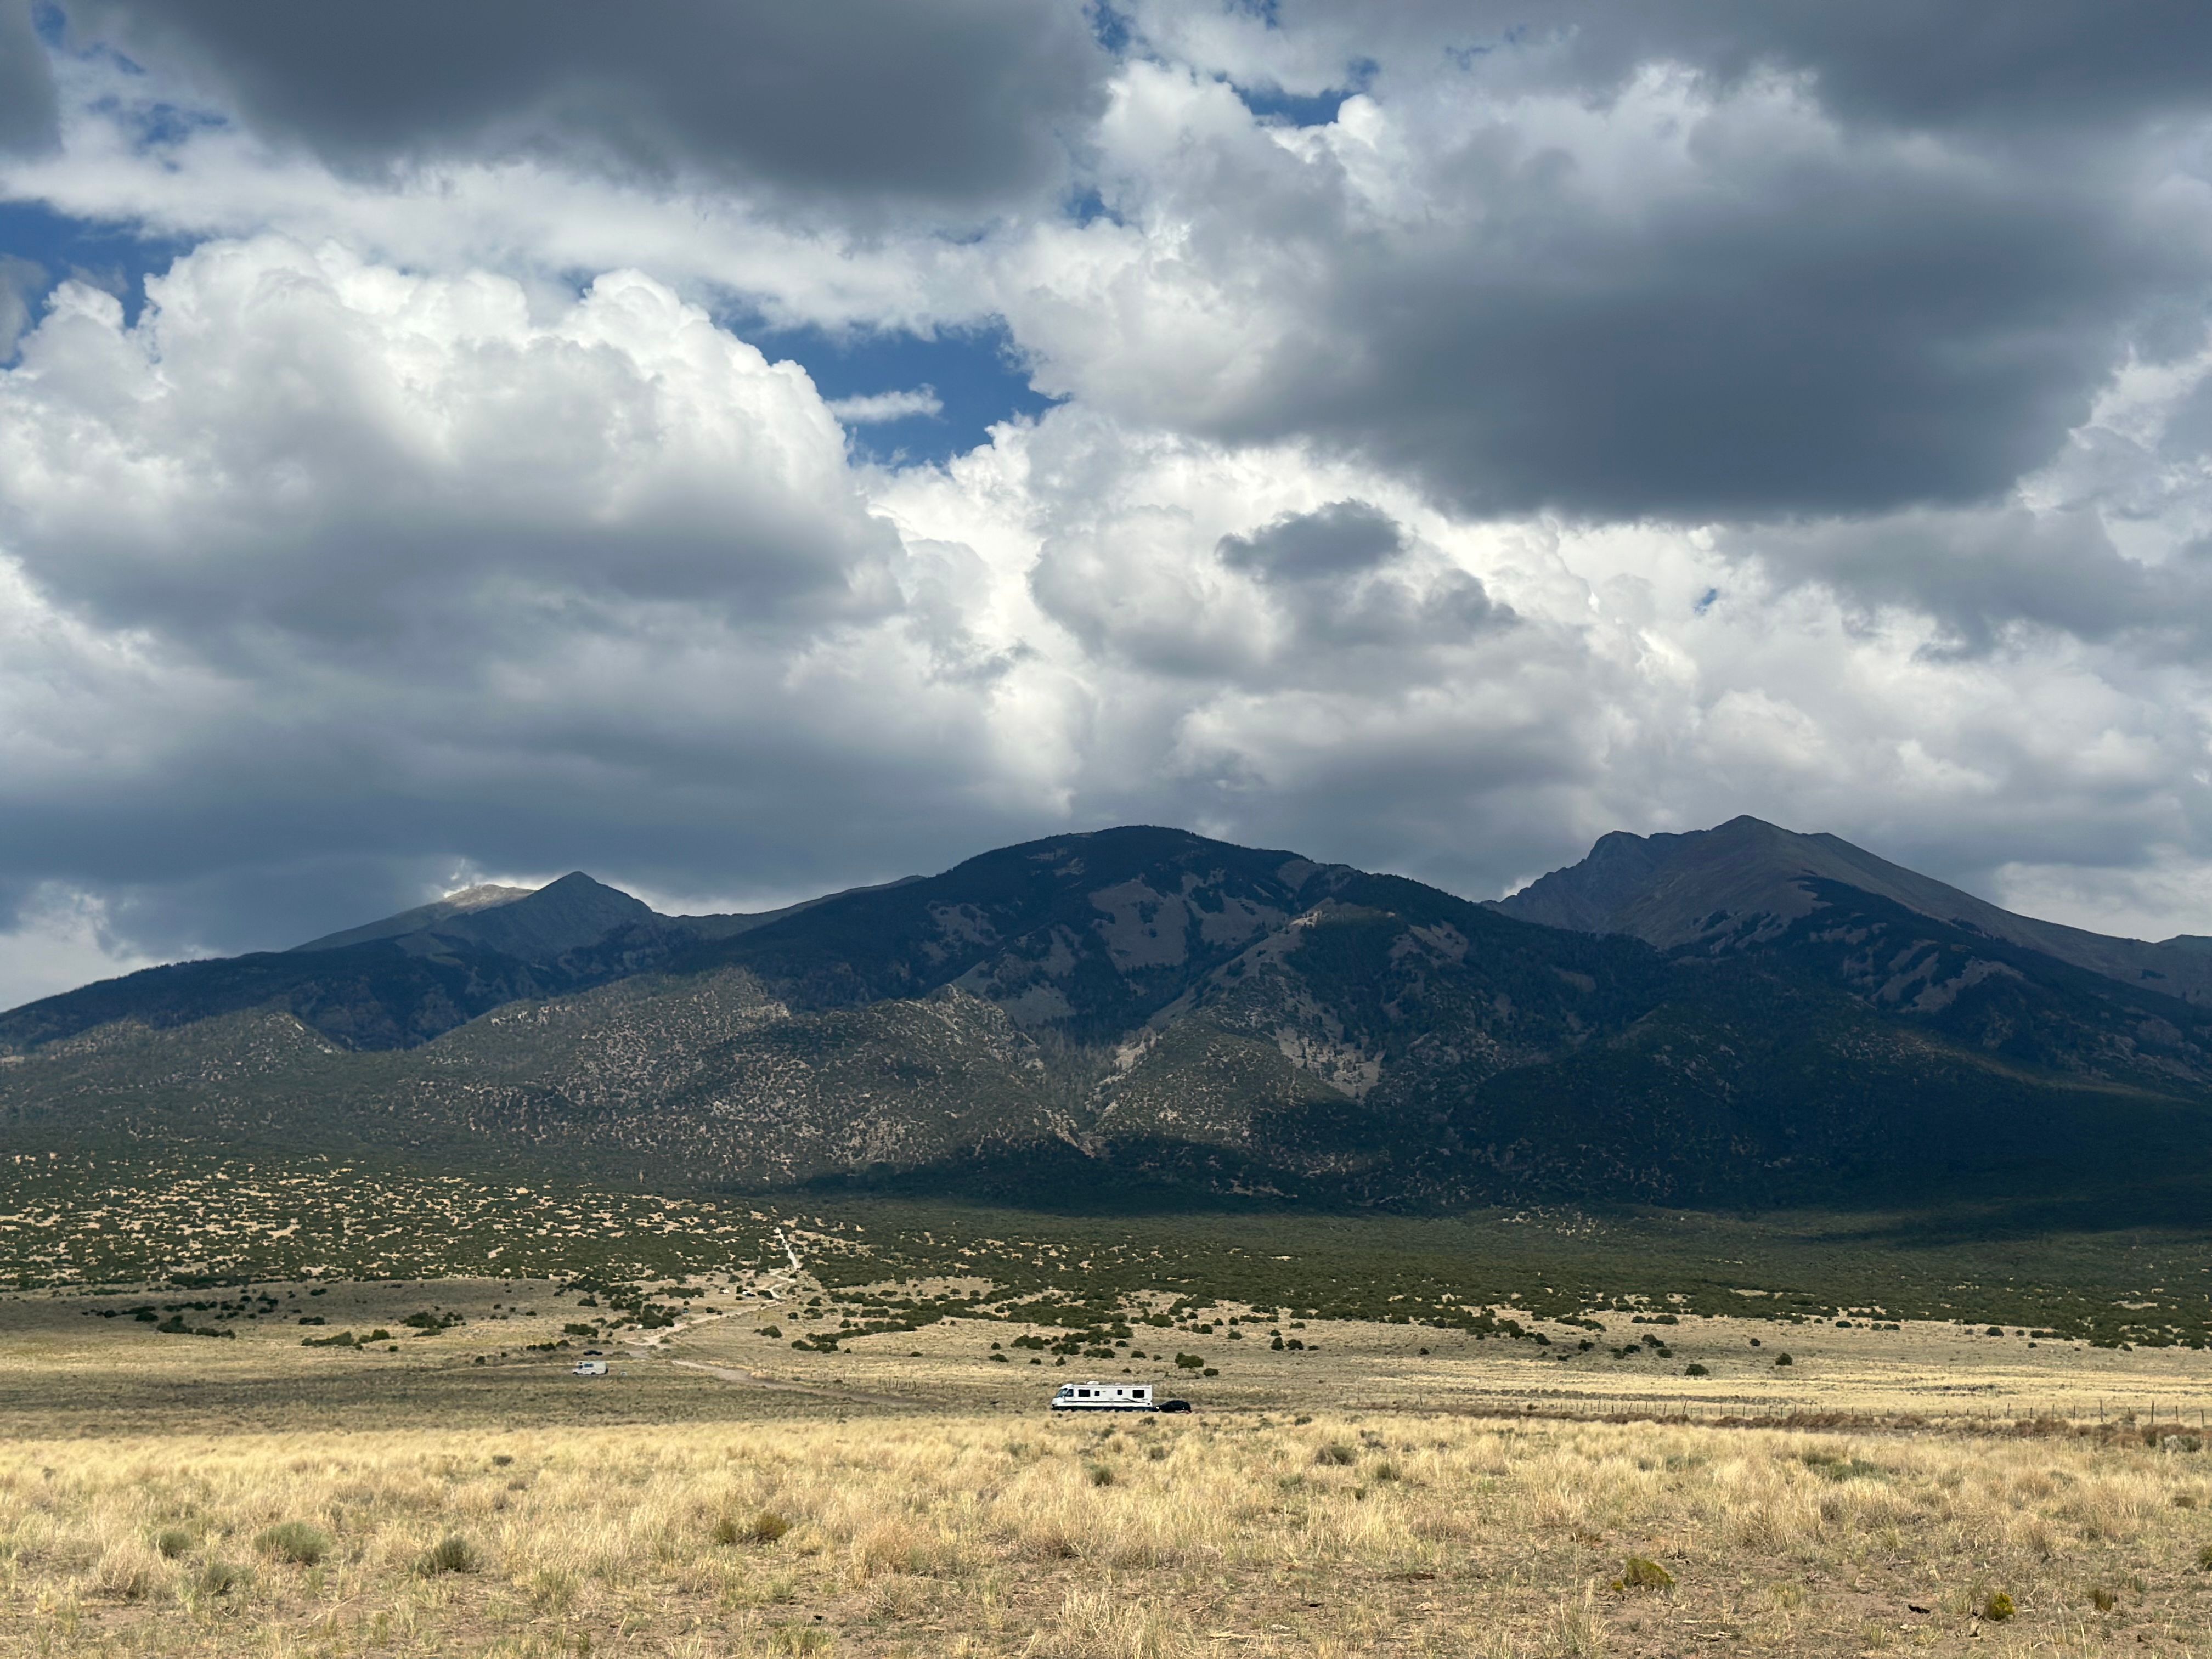
Our friend has a TRD Pro Toyota 4runner, which was perfect for the Lake Como Road. We parked the single person's Subaru at the bottom and all piled into the 4runner. With the capable ride, experienced drivers and spotters, we made it to about 10,200 feet elevation before parking.
Getting a ride with someone who has a capable 4x4 or similar vehicle is so nice. Even if you can shave off part of the Lake Como Road it's worth it. The road is mainly traveled by 4x4s and OHV so it's not particularly friendly to backpackers having large river rocks, uneven and loose dirt, and being mostly unshaded.
We started from the bottom of the road at about 3pm. There were storms to the south, but we knew they were going to miss us. We started hiking around 4pm and hiked about 3 miles in to Lake Como, arriving around 5:30pm.
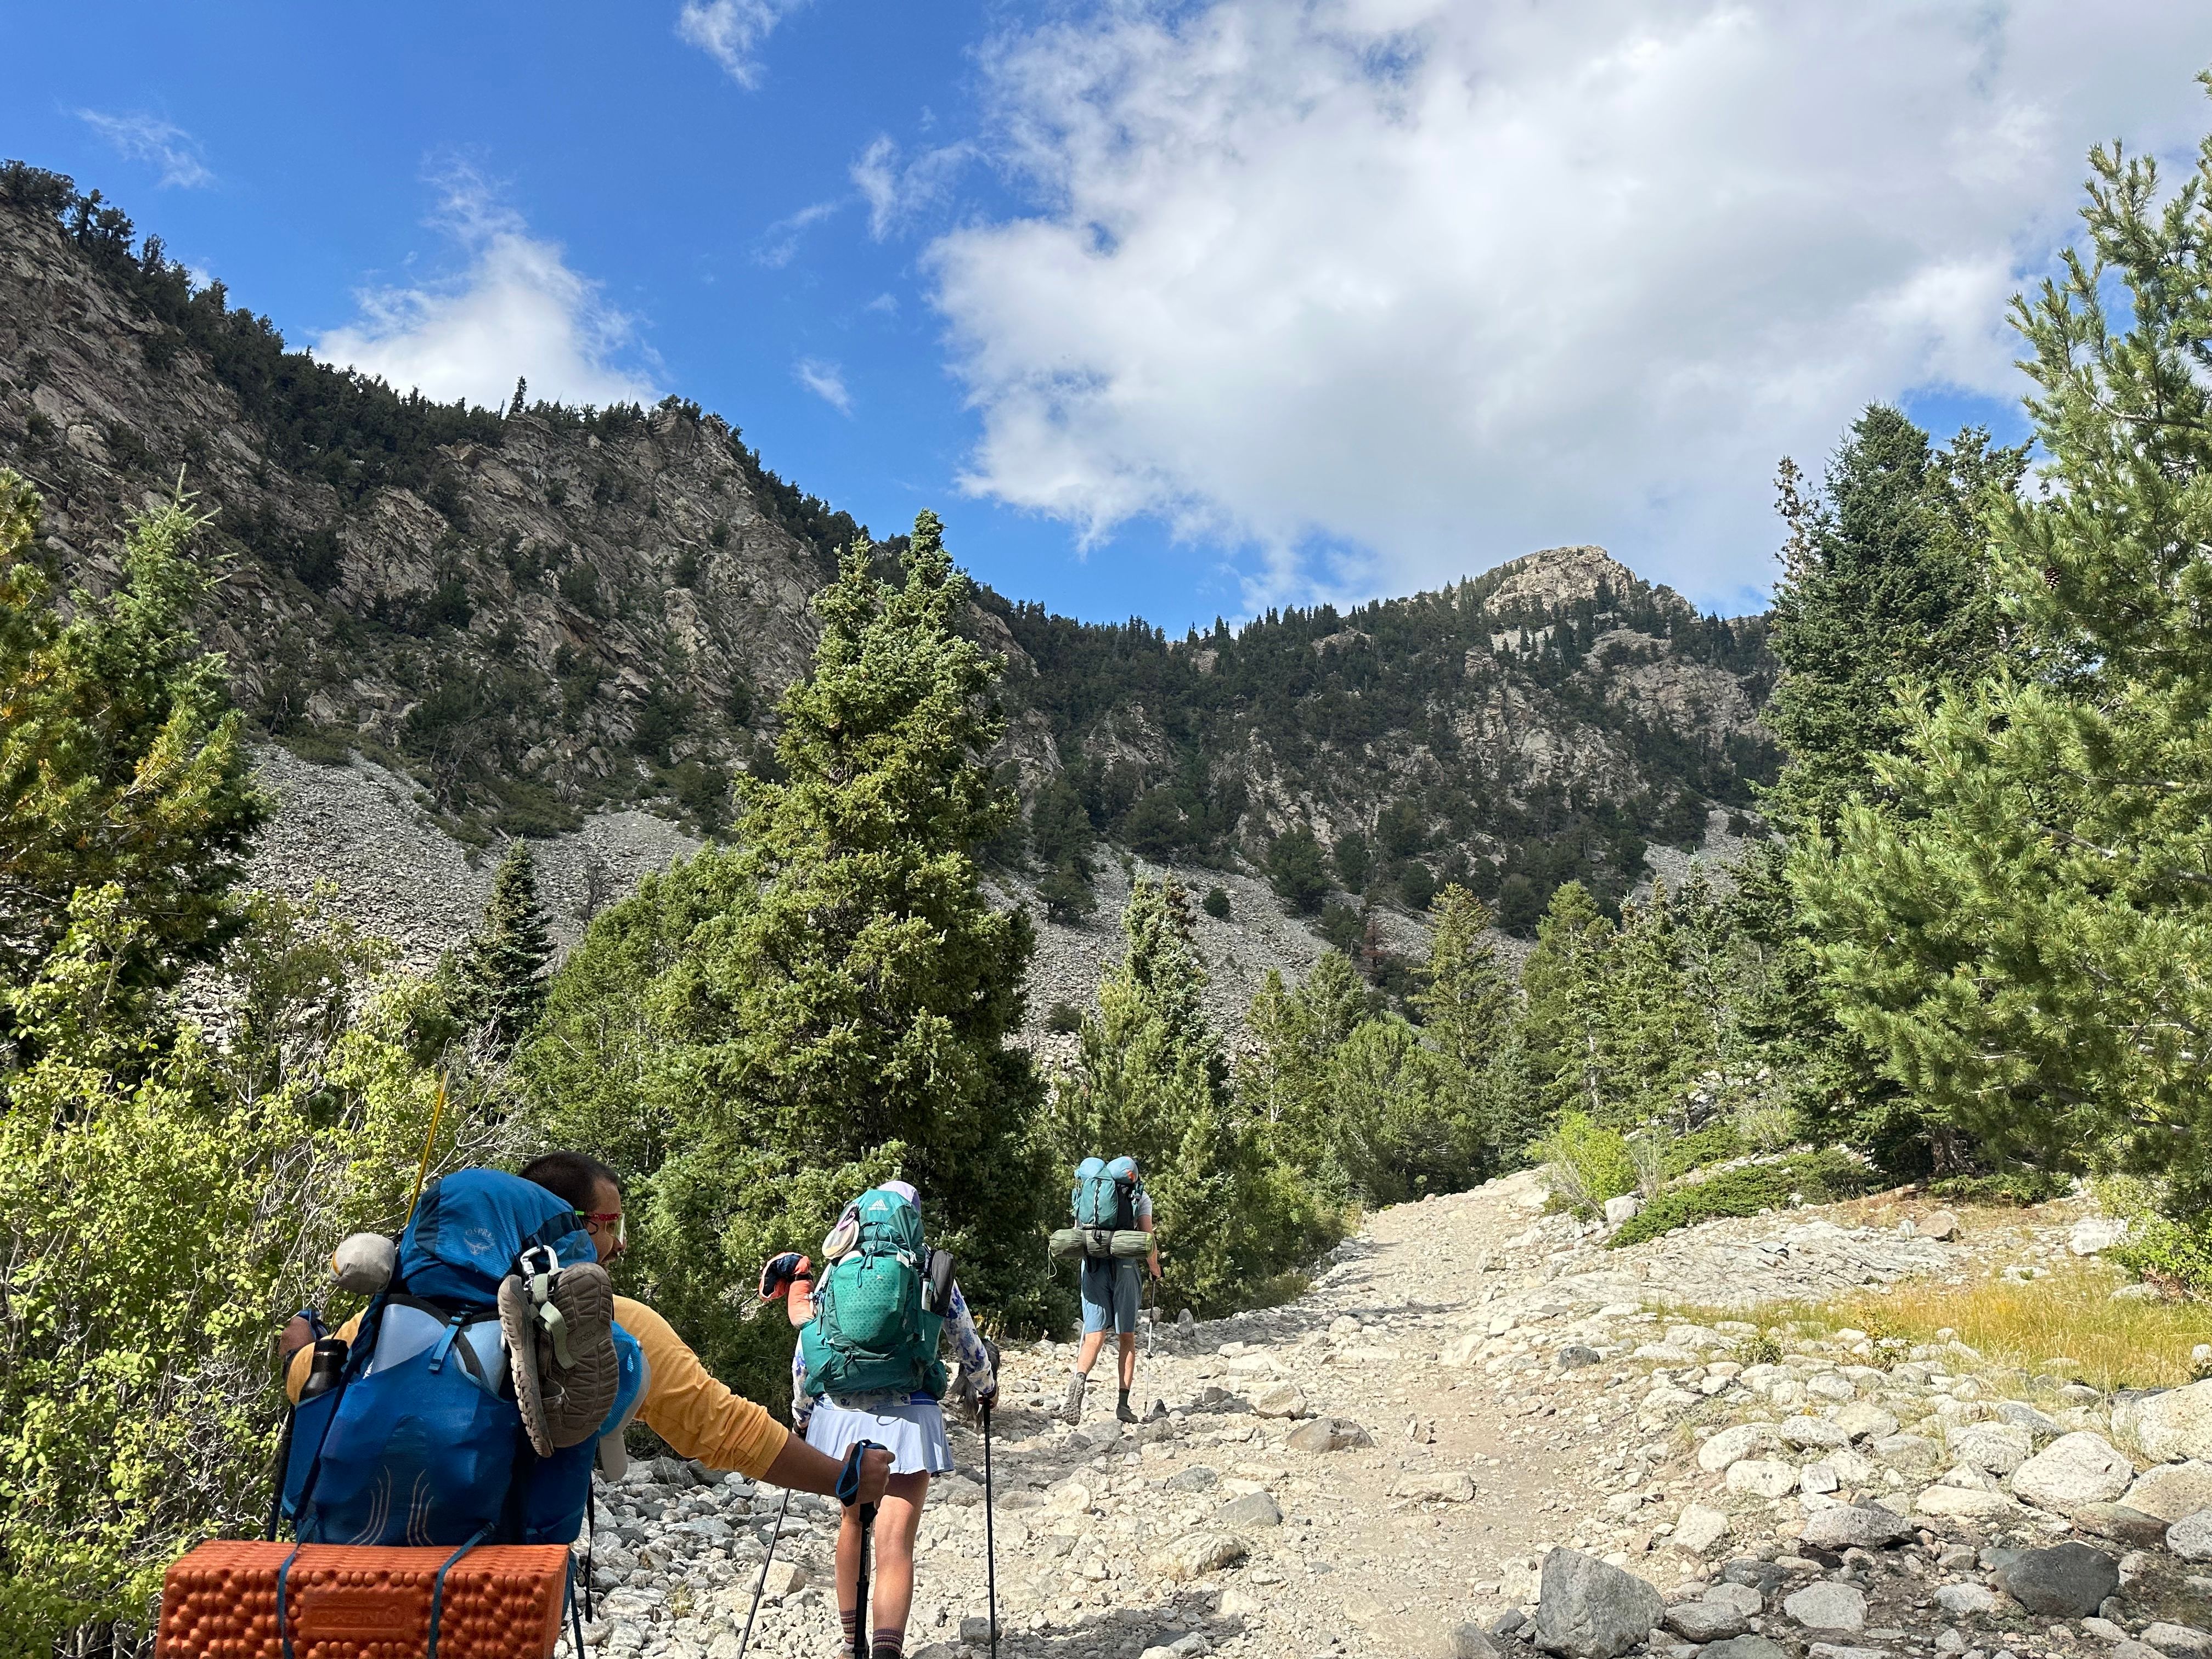
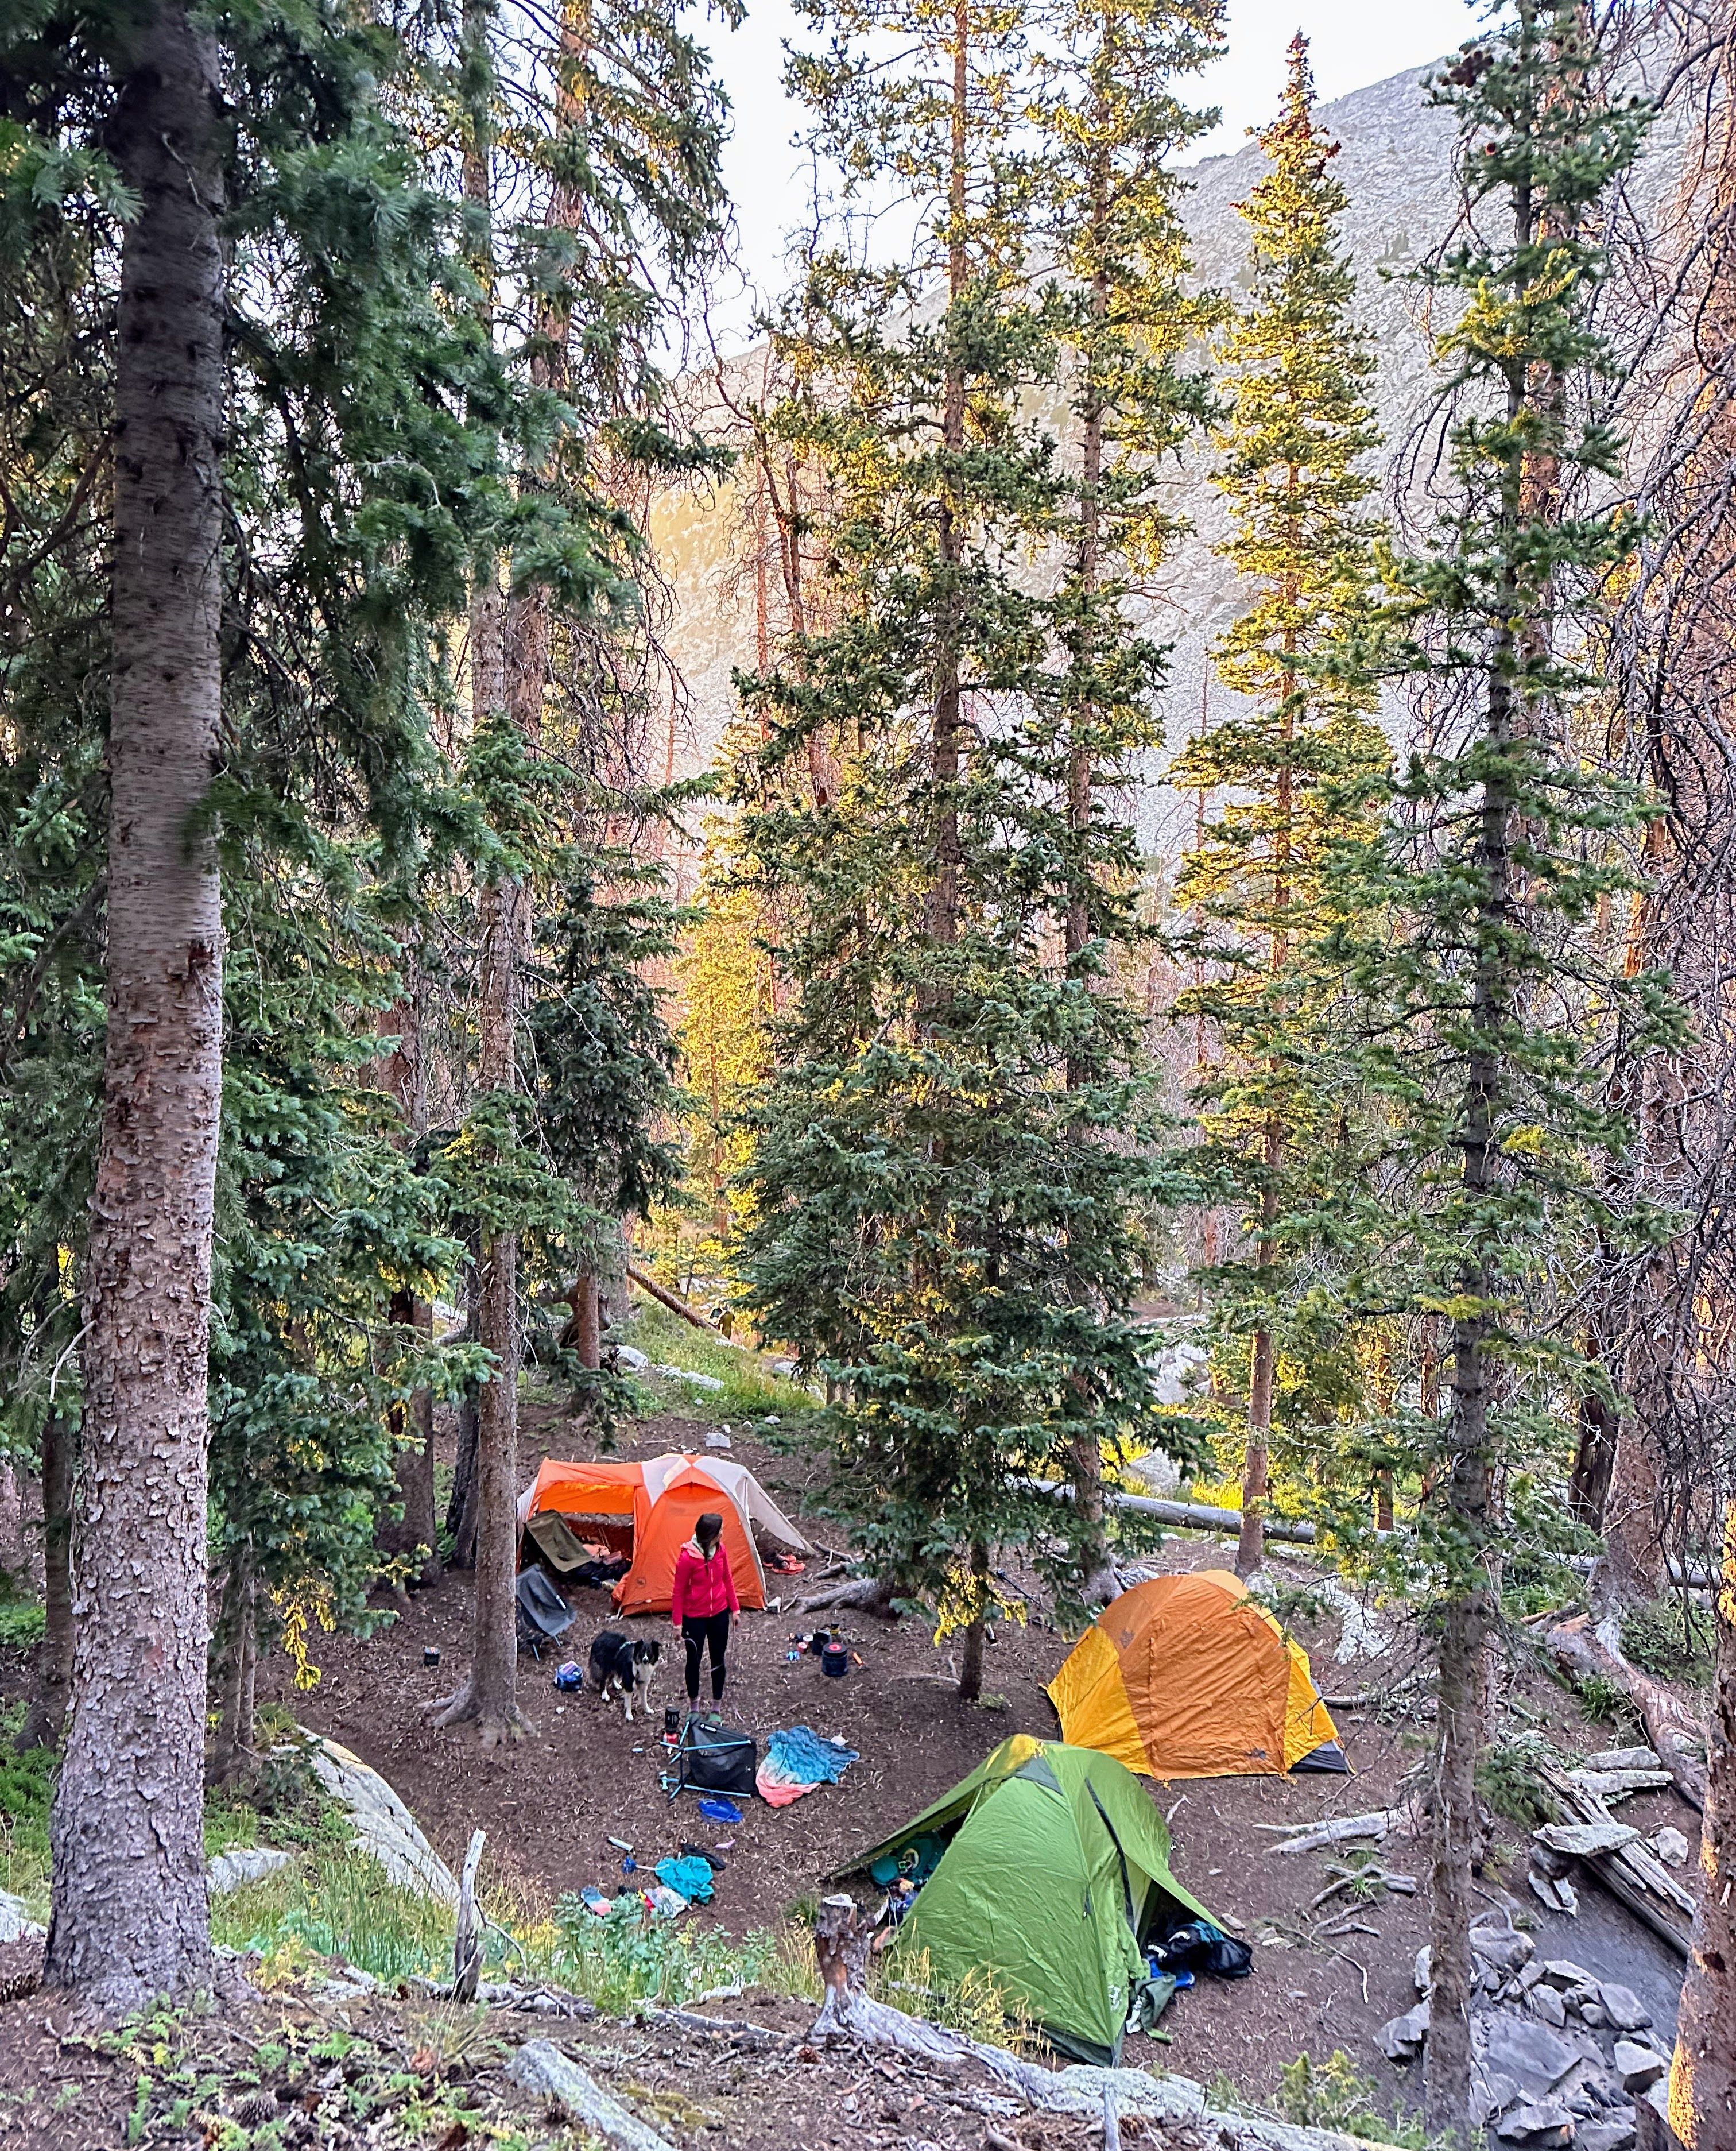
Basecamp at Lake Como (11,800')
There are plenty of campsites along the south side of the lake, and some are hidden above the trail on the hillside. On a mid-August Friday around 5:30pm there were other backpackers, but there were still campsites available. Look around for established campsites, some are even hidden above on hillsides. Don’t forget to follow Leave No Trace practices.
Water is never really an issue here. The lake is always close and there are streams on the west and southeast side of the lake to find clearer running water. No issues with water quality or taste from the running streams. For wildlife, there are plenty of pika and marmots, as well as mice, though we didn't see too many. There are bears occasionally so we brought bear cans, storing all smelly things in there. We had 5 people making 3 groups: my wife and I had our own bear can, the single person had their own, and the other 2 and their dog shared a bear can.
I slept great with my 20°F down sleeping bag and Nemo Tensor insulated sleeping pad (R-value 3.5). With overnight lows of only about 40°F, I was very comfortable and actually a little too warm.
Summit Day: Pre-Dawn Start
We started at about 4am to get a good deal up Blanca to catch a good sunrise. Our lightweight day/running packs were awesome to keep us fast and light.
Timeline:
- 4:00am - Leave camp
- 6:30am - Blanca summit
- 8:00am - Complete traverse to Ellingwood Point
- 9:00am - Ellingwood summit & celebration
- 8:00am - Return to camp (~4 hours total)
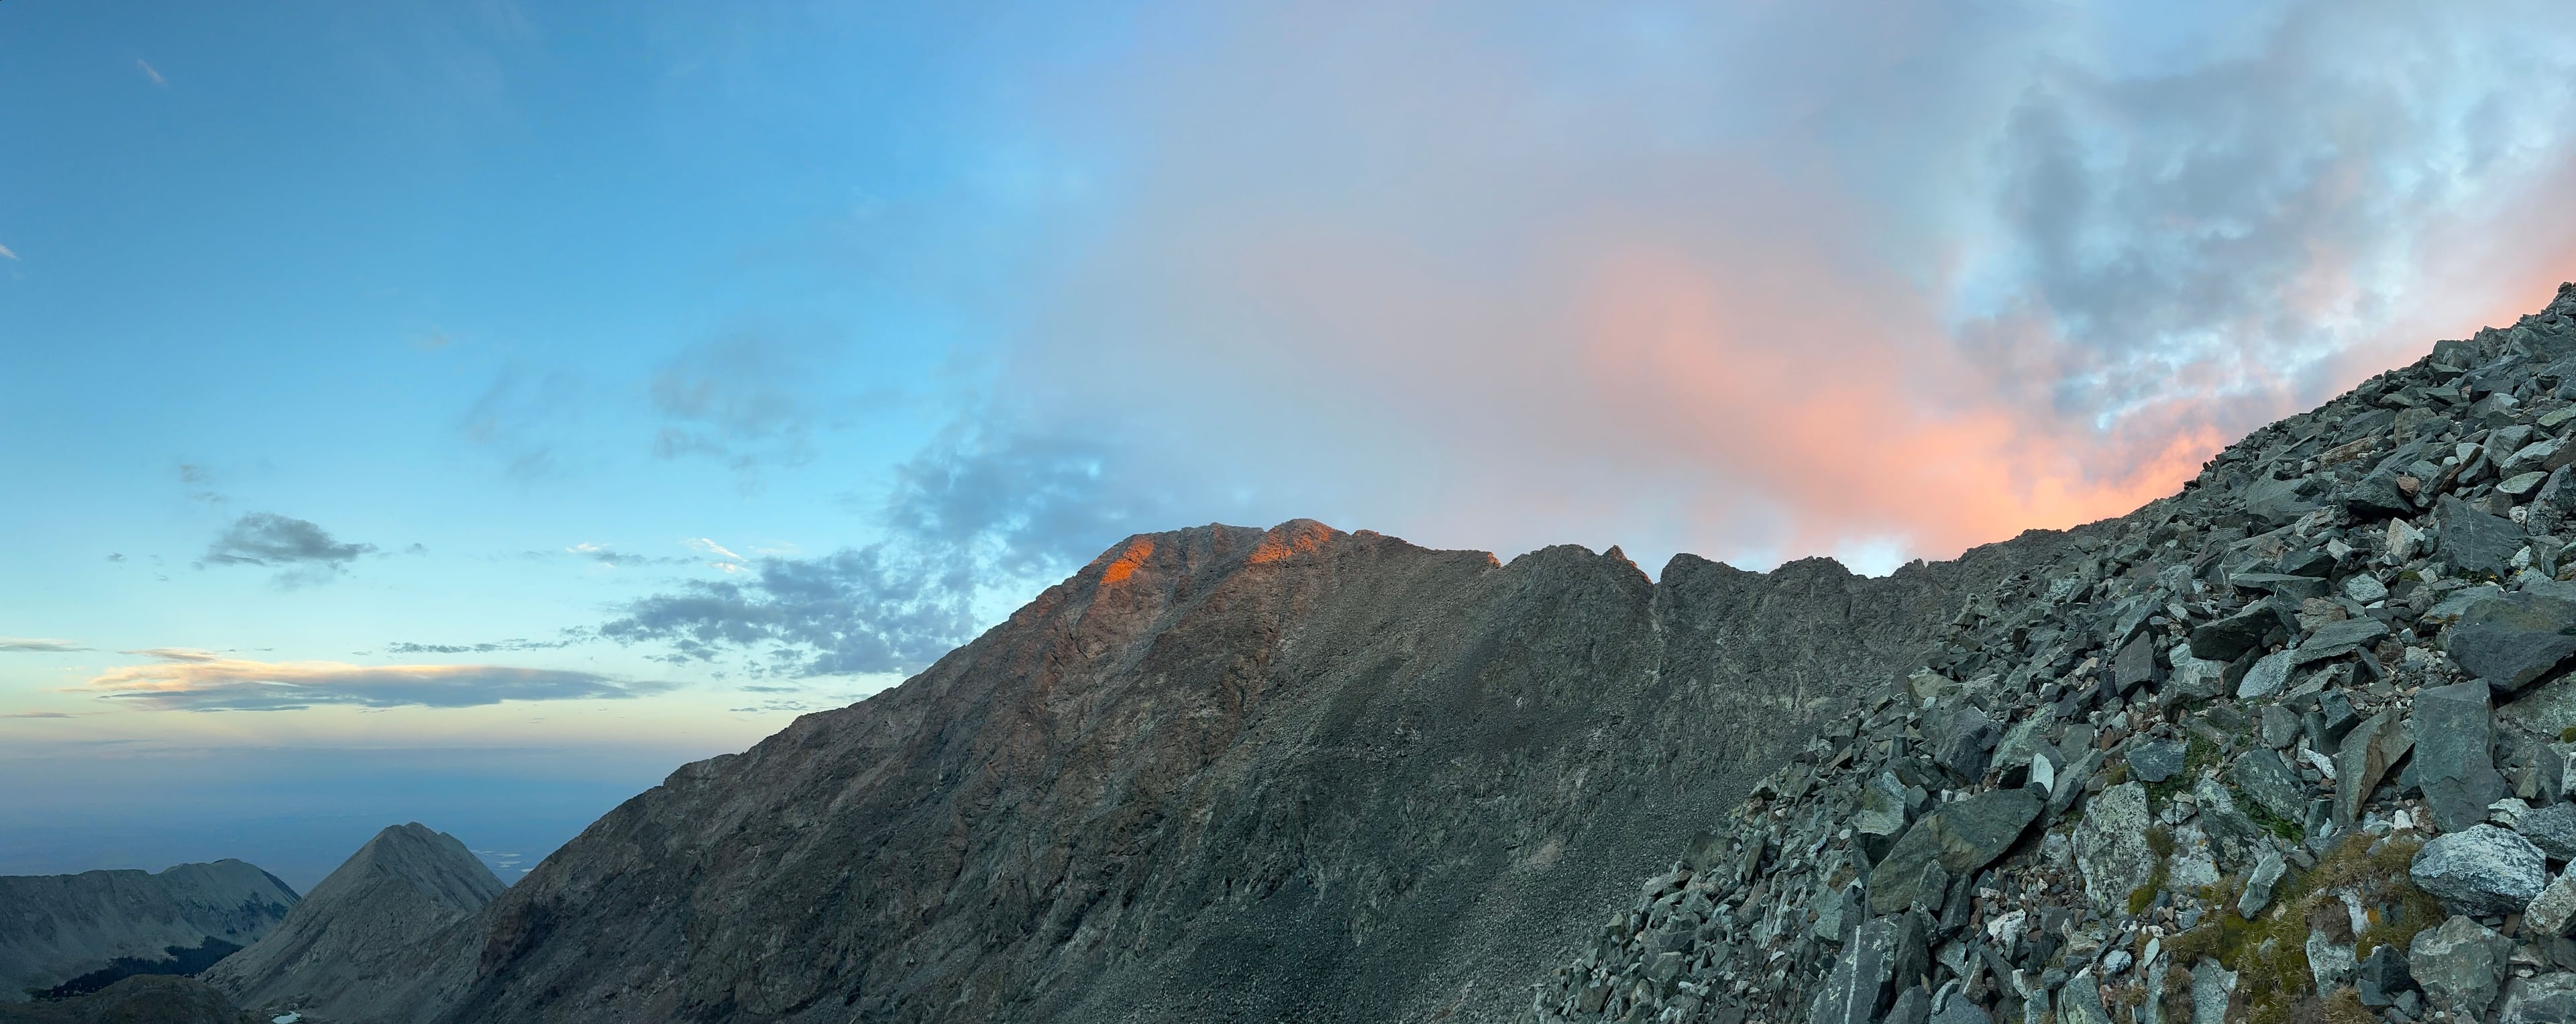
Mt. Blanca: Sunrise & Clouds
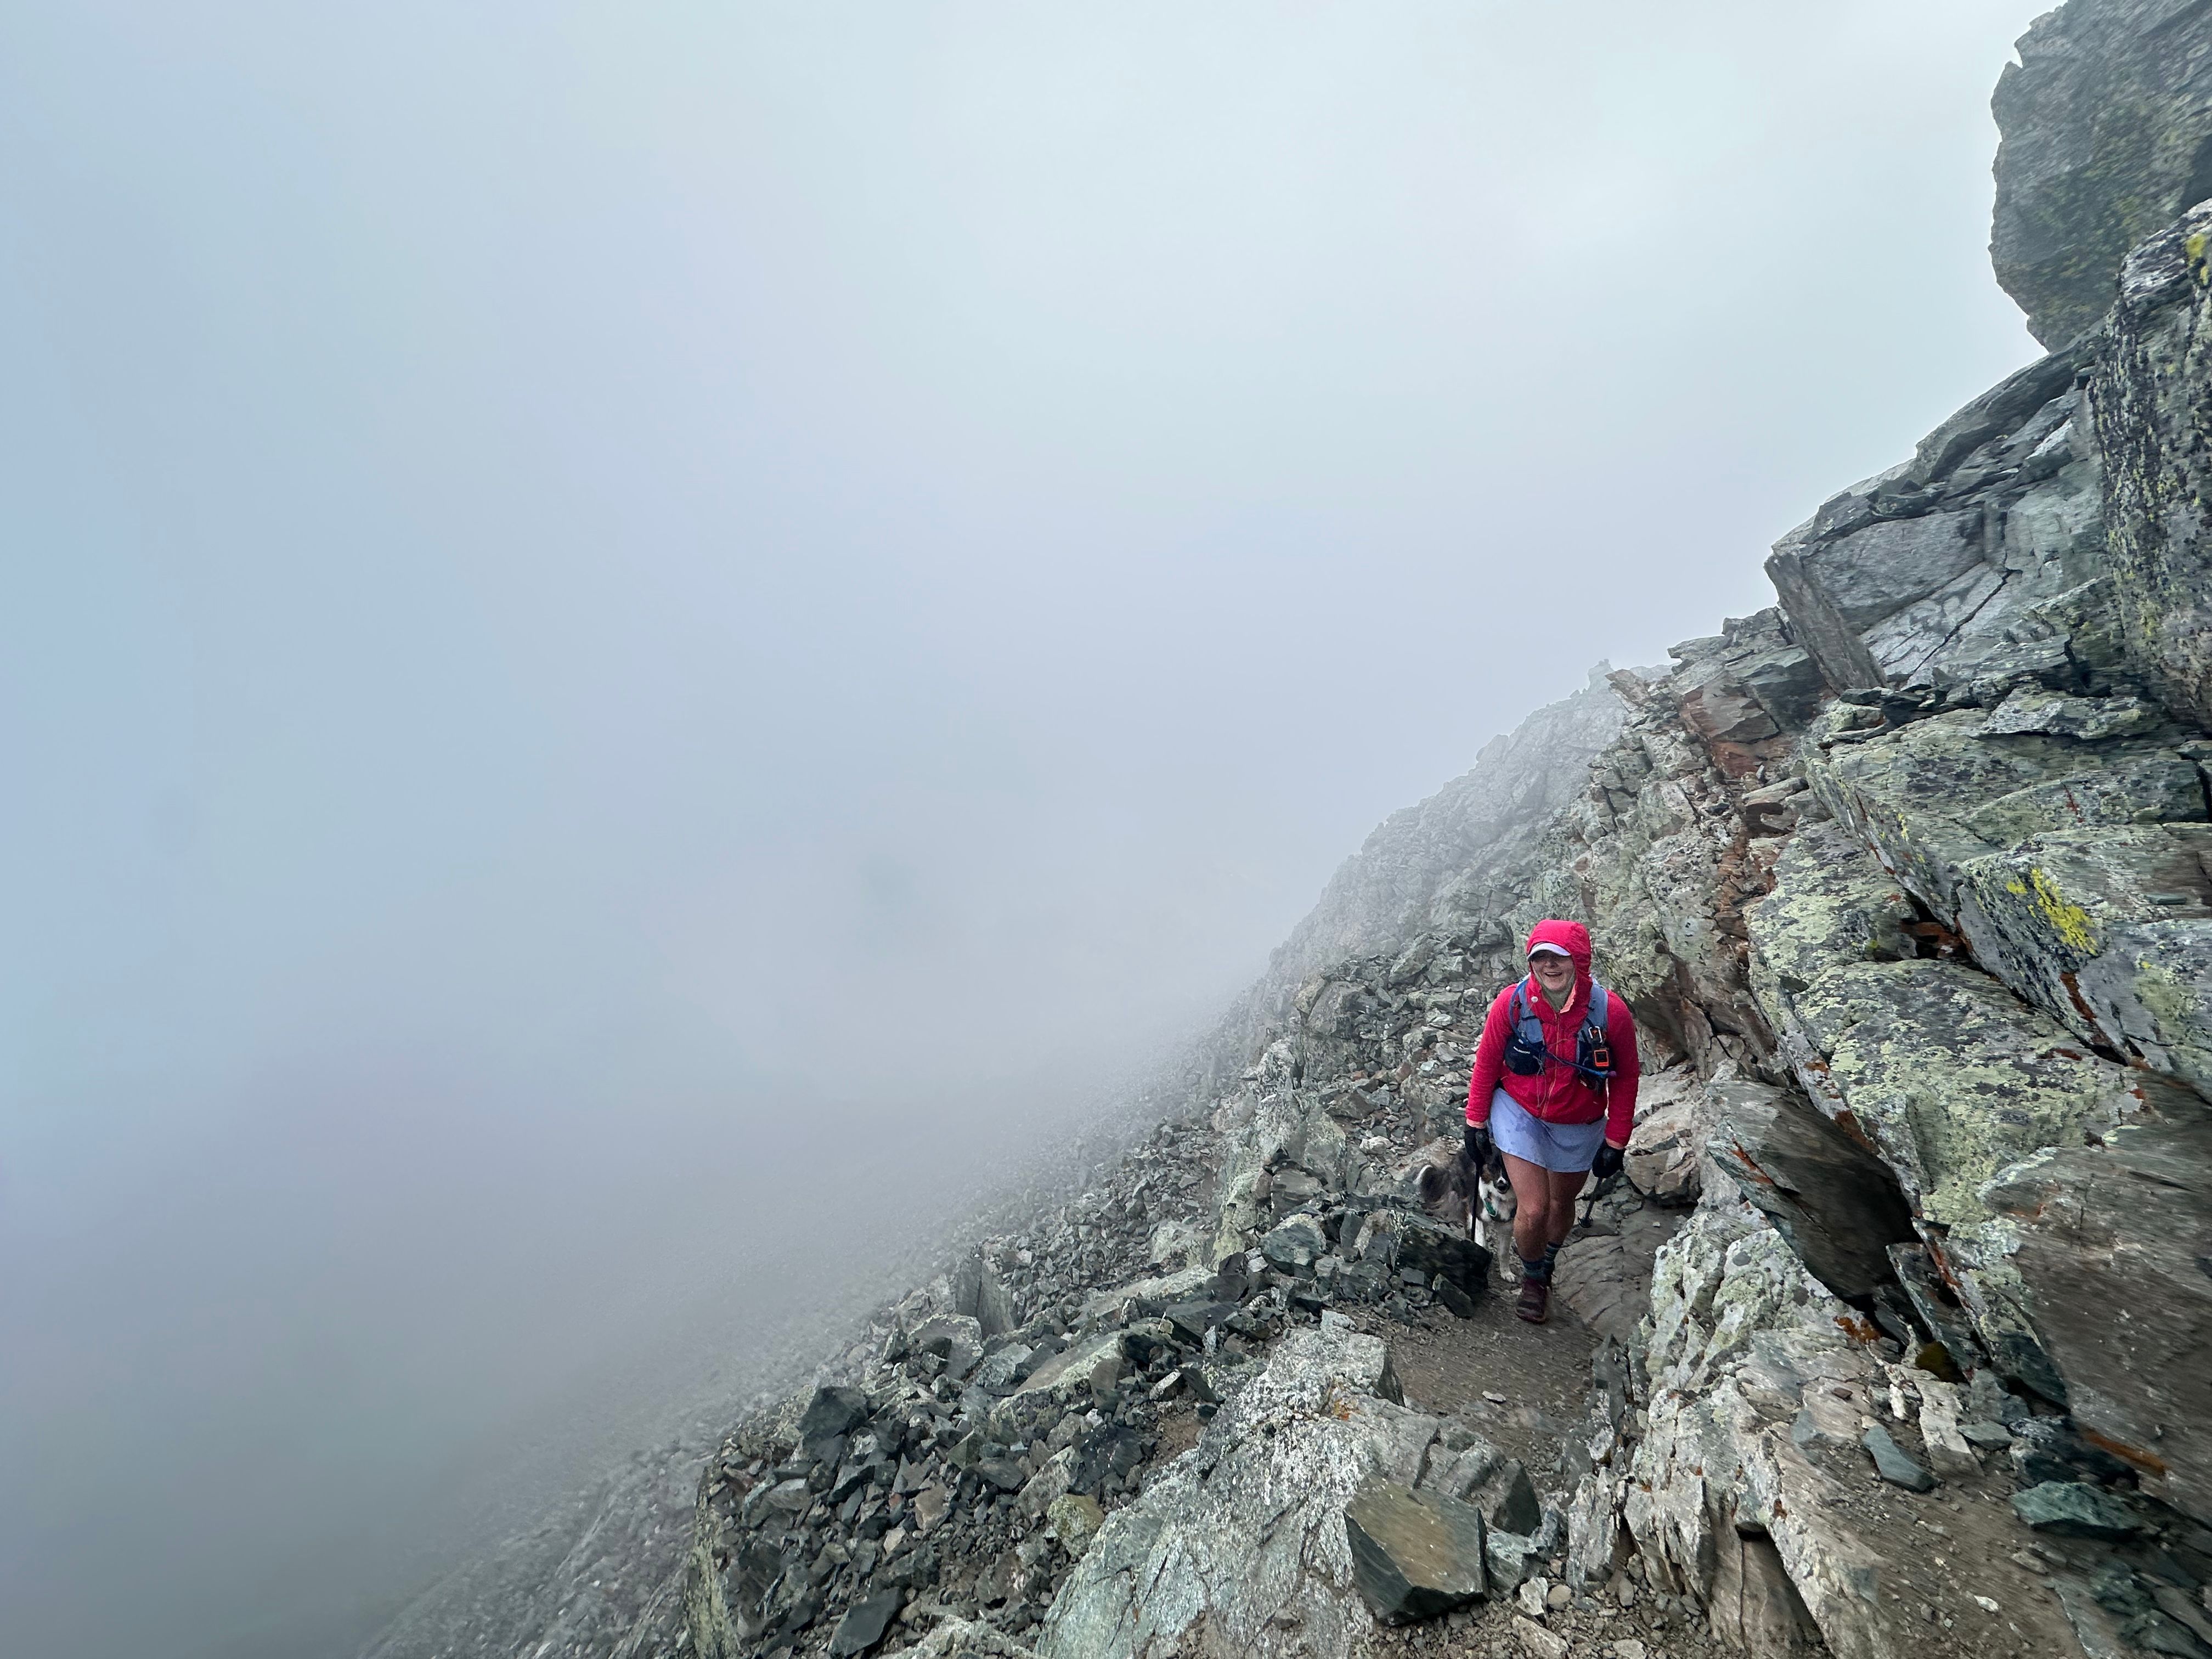
The route up Blanca is well cairned and has quite a few switchbacks as you get higher, so keep a look out above you and over your shoulder for the cairns. As you get higher on the ridge closer to the summit, there are multiple paths, but more rockfall risk. You can easily kick talus at this point, something to look out for if there are climbers below you (which there shouldn't be but sometimes people do take steeper lines up). There are also large square solid rocks to climb up for more confident climbers. Overall really fun summit.
The clouds made excellent backdrops for the sunrise. They also created a foggy summit on Blanca that broke a few times to show us views of Alamosa County to the west and Mt Lindsey to the east.
Weather Reality Check
The clouds and wind were very chilly on Blanca's summit and upper ridge. The wind chill was about 30°F. My lightweight rain jacket, puffy, and gloves were essential to keep me warm. The weather on Ellingwood was surprisingly better even though Blanca still held clouds at its peak. As we got lower to camp, we walked into the sunshine, with clouds still holding on Blanca and Ellingwood.
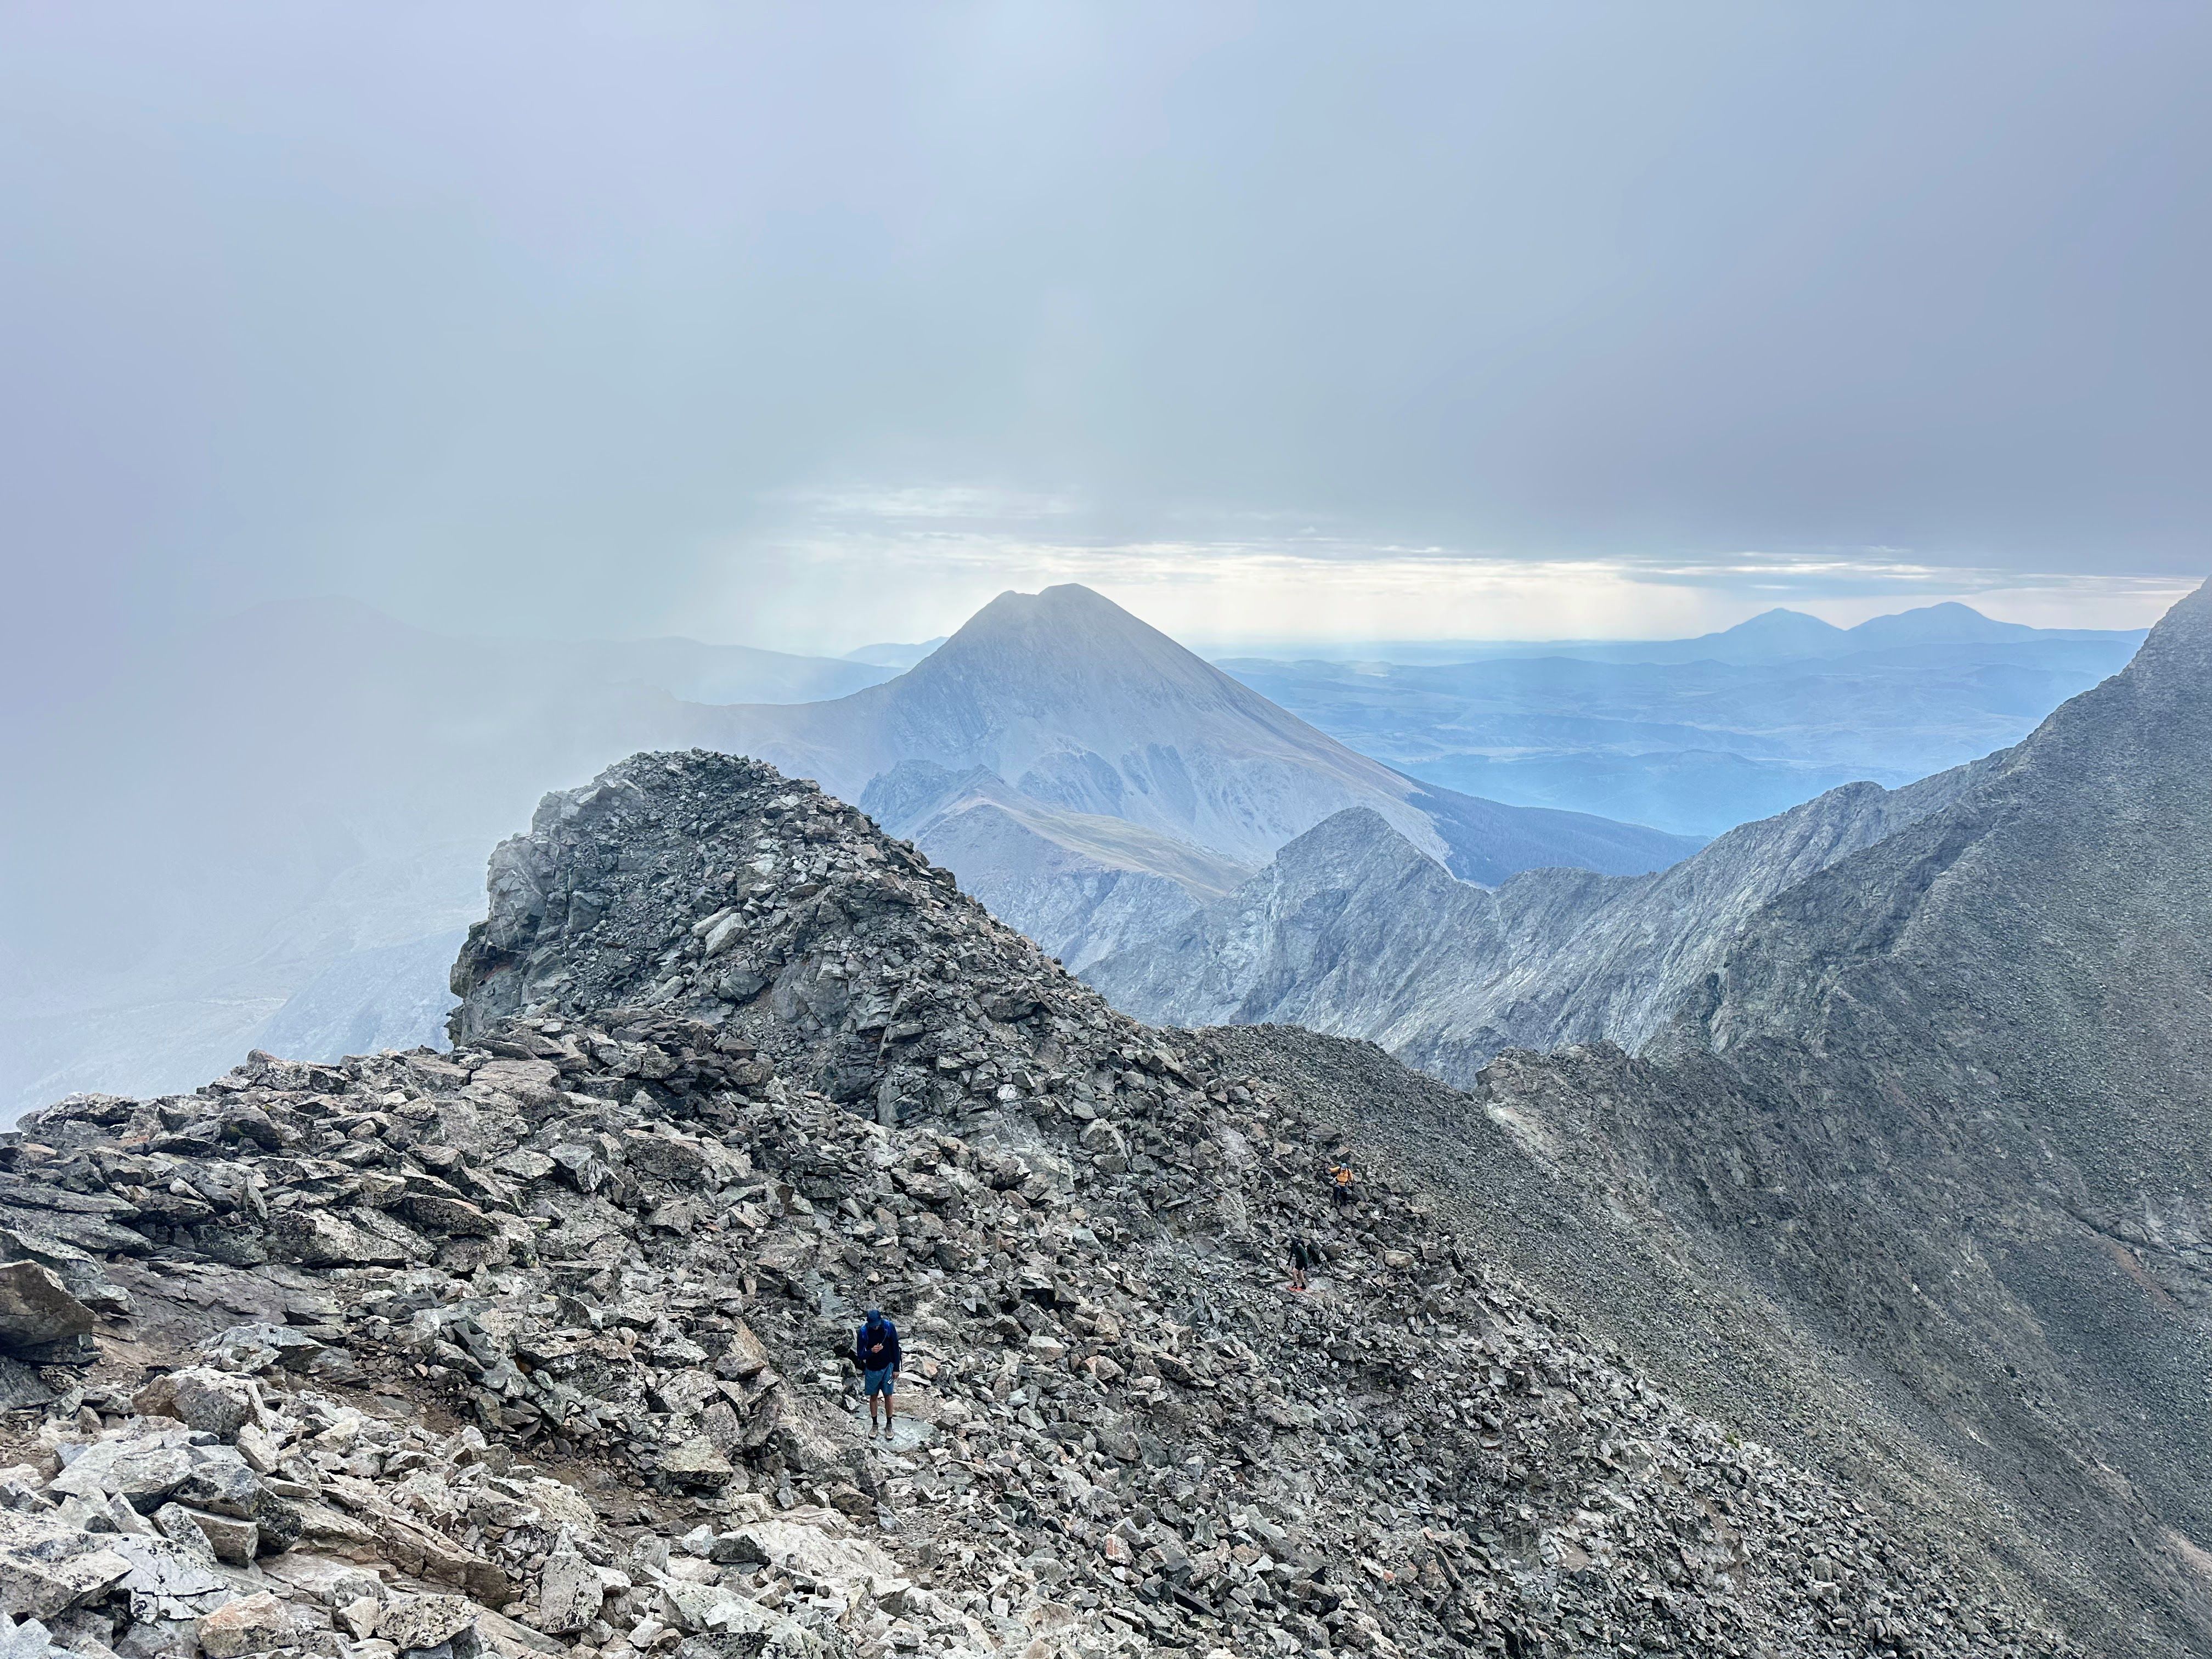
The Blanca-Ellingwood Traverse
After summiting Blanca, we started descending to the Blanca-Ellingwood saddle. There we talked with the group about the routes we would take over to Ellingwood Point. The route has a few options: a class 3 scramble or a "difficult" class 2 traverse. We didn't want to take the dog across the class 3 because of exposure.
Two decided to do the class 3 ridge while the rest of us descended a little more to the class 2 route. The radios were absolutely critical here because the group on the ridge were almost directly above the other group and could potentially kick rocks down. We should have spaced a little further apart because the group on the ridge had to wait a little longer than they would have liked for the lower group to pass.
Both groups did meet up sooner than expected. The lower group felt confident in their abilities and made a higher traverse than the class 2 route described.

Ellingwood Point
Toward the upper sections of Ellingwood Point there are cairns but the climb is a little more difficult class 2 with larger rocks and talus to navigate. If you aren't on the ridge or on route, the potential to kick rocks is much higher and definitely something to look out for because climbers take a lot of different routes up and down.
Dramatic Rockfall Event: As we were 200 feet from the summit of Ellingwood, we heard multiple large rockfalls coming from Blanca and Little Bear Peaks. One was from the upper ridge to Blanca that fell across a section where climbers had been earlier in the morning. No one was hurt. The rockfall from Little Bear was much louder and even prompted a search and rescue helicopter to make a courtesy flyby later in the day to see if anyone was injured. We had friends looking at the 14ers and SAR Facebook groups so we were informed that it was just a flyby and no one was found injured.
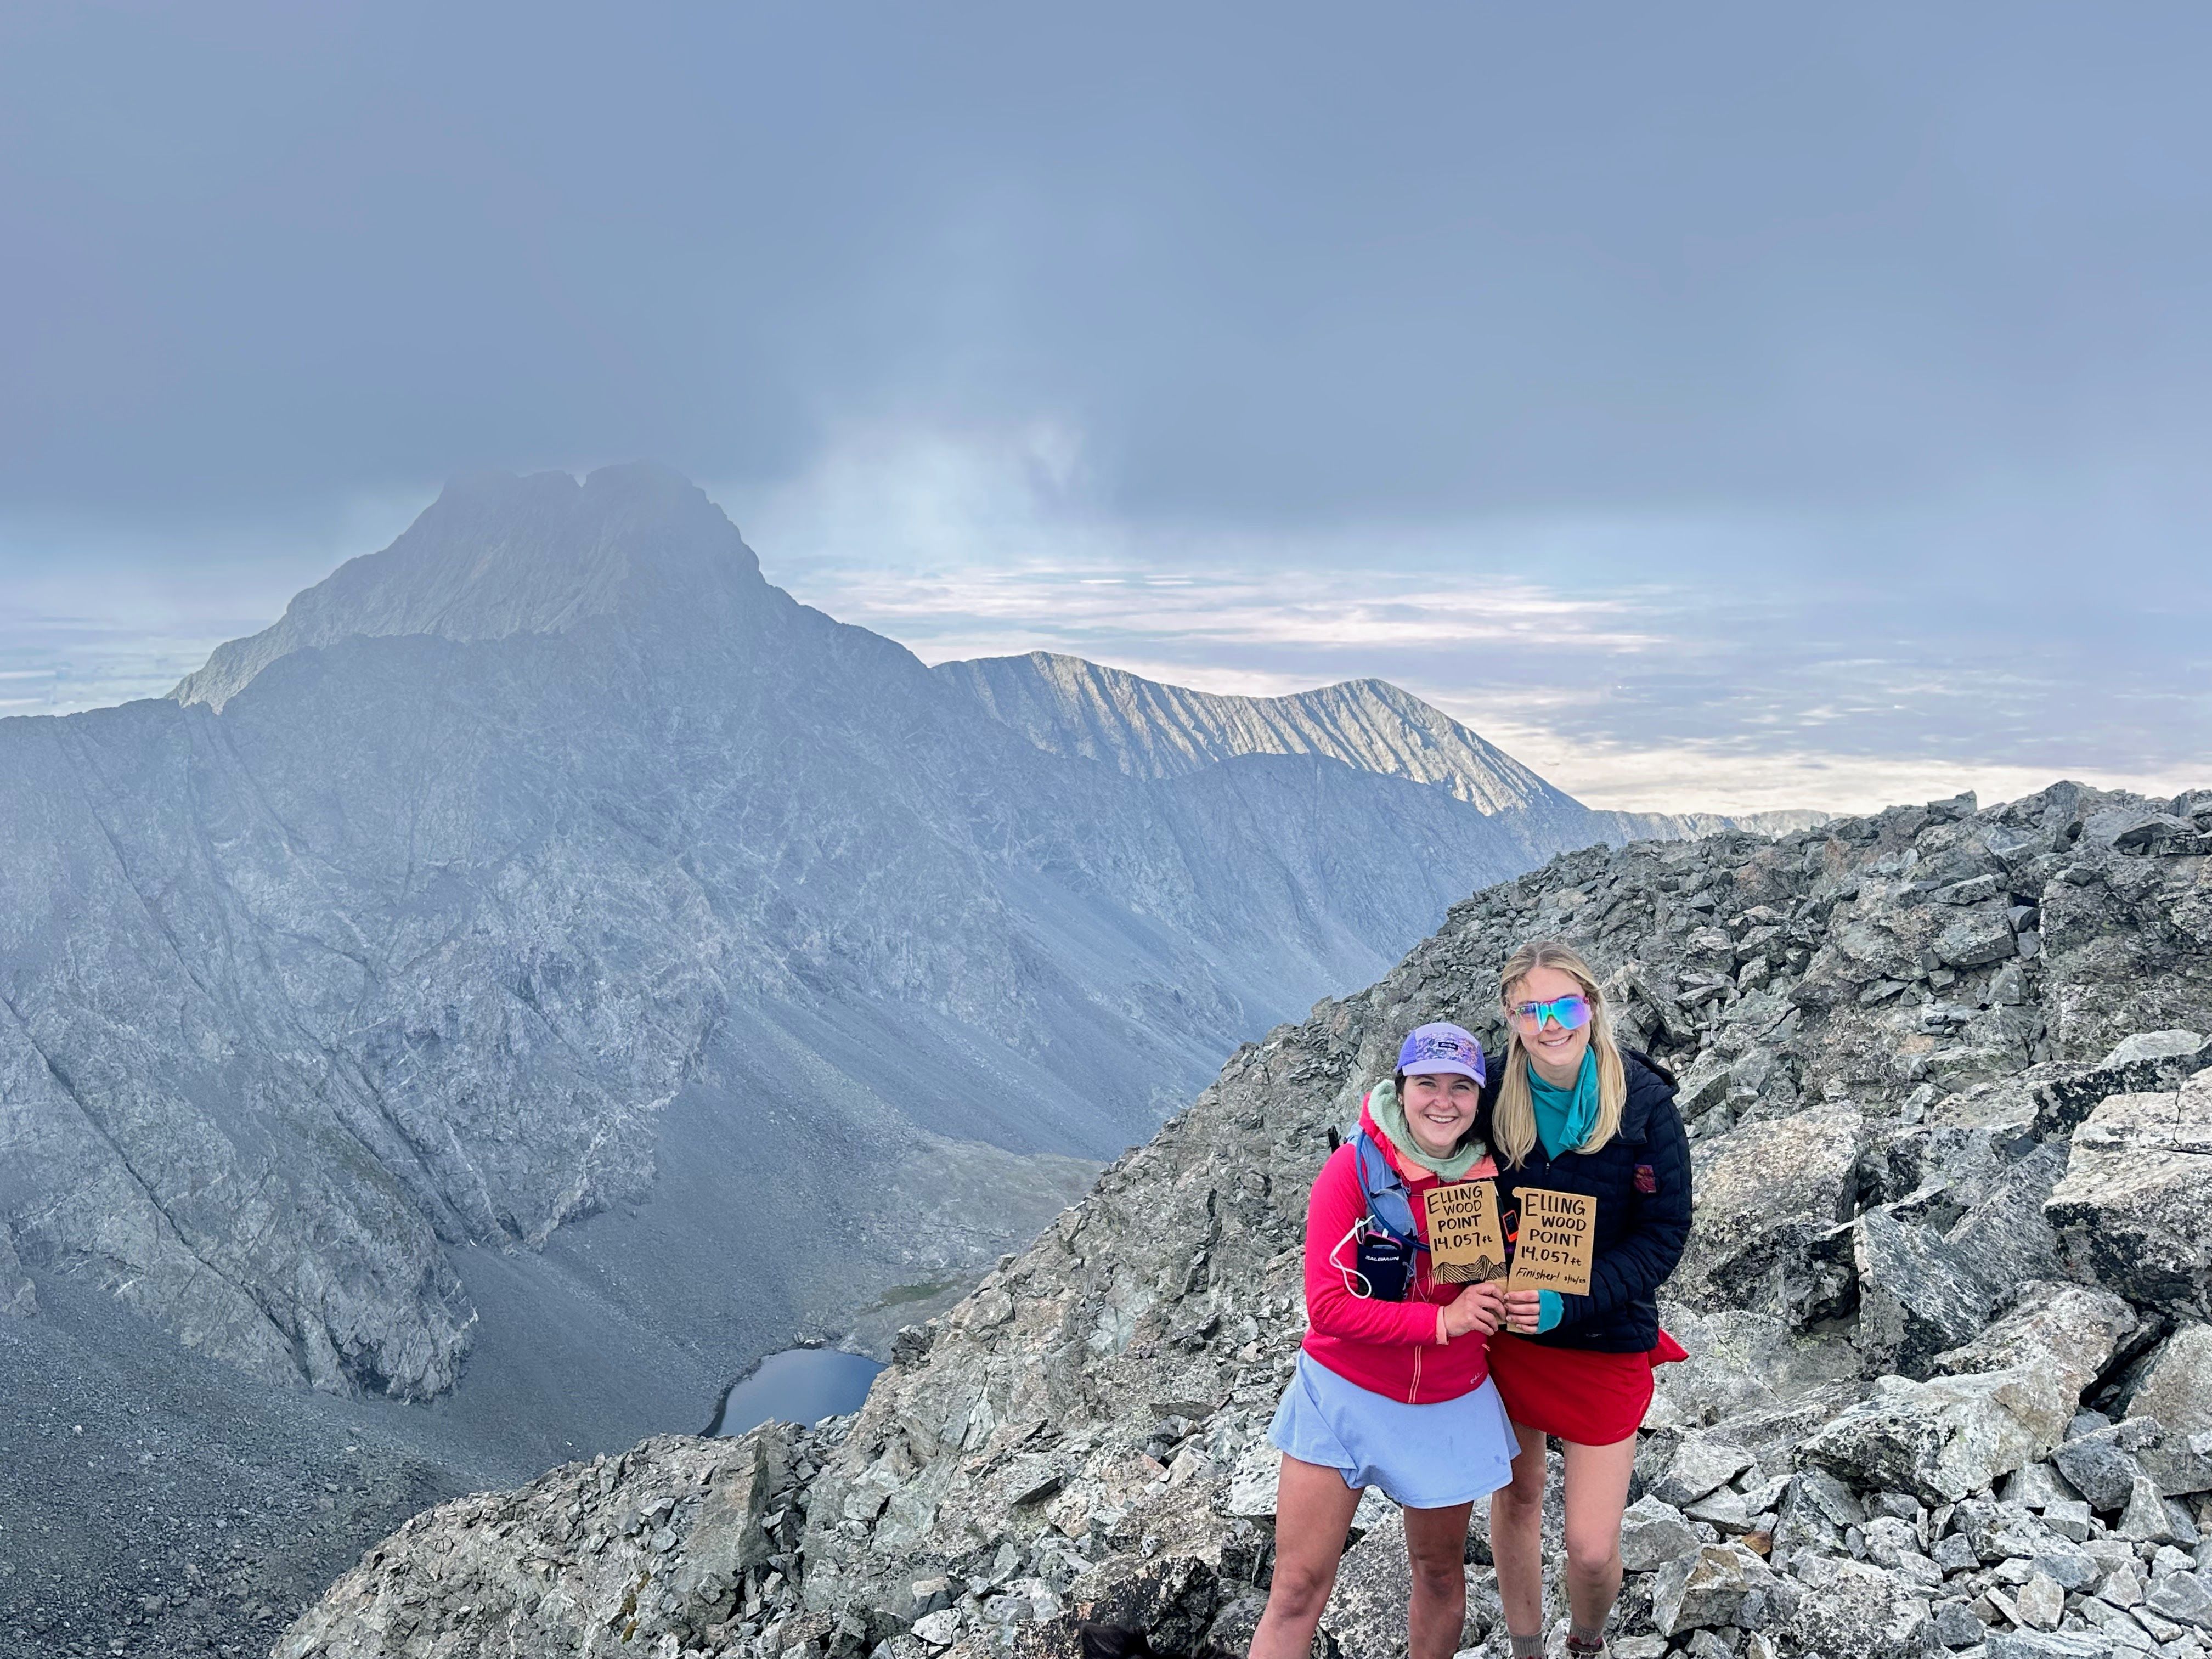
The Celebration: We summited shortly after, celebrating both Kylie and Ally's incredible accomplishment of "finishing" the Colorado 14ers! Photos are always the tradition, along with cardboard signs that my wife makes - she likes drawing little things on them or adding dates. It felt awesome. It always feels so accomplishing and amazing to be on a peak, but this time I felt so proud of my wife and Ally. I was so glad I was able to be a part of this day. After some photos and food, we started the descent.
The Return Route
If you are experienced enough there are multiple routes down Ellingwood, but the potential to start rockfall is higher on these sections. Still, there are lots of cairns to follow. After a quick descent, we made it back down to camp. Both peaks and our celebrations took us about 4 hours total.
We got back to our car at about 2:30pm after taking a break from climbing, eating and packing up. We got to the lower part of the Lake Como road at about 3:30pm.
Overall I felt comfortable and very prepared. However, I had lightweight rain pants that I packed in but didn't bring on summit day. It would have been nice to have near the top of Blanca, but it worked out okay. I was just a little cold for 30 minutes (everyone was cold on Blanca that morning).
Beta for Future Climbers
Route-Specific Tips:
- Preview routes thoroughly using multiple sources (14ers.com, AllTrails, guidebooks)
- Mark the 13,400' junction on GPS for navigation
- Space groups appropriately during traverse sections
- Stay right of ridge crest on Blanca's northwest ridge
General Logistics:
- The long Lake Como road approach doesn't have any water until you get higher (about 10,500 feet)
- Bug spray is nice to have because there's lots of water around Lake Como that makes it a little buggy
- Being prepared and knowing what the weather is going to be like before you go will allow you to pack everything you need
- Knowing your limits and what you're capable of will make your trip more comfortable
This was such a fun way to finish Kylie's Colorado 14ers. The route-finding, teamwork, and celebration at the summit of Ellingwood Point made it a trip we'll never forget.
Photo Credit
• Ally
• Kylie
• Connor
• Luis
Enjoyed this adventure report?
Whether you're planning your first 14er or looking for gear recommendations, I love to help fellow adventurers get outside safely.